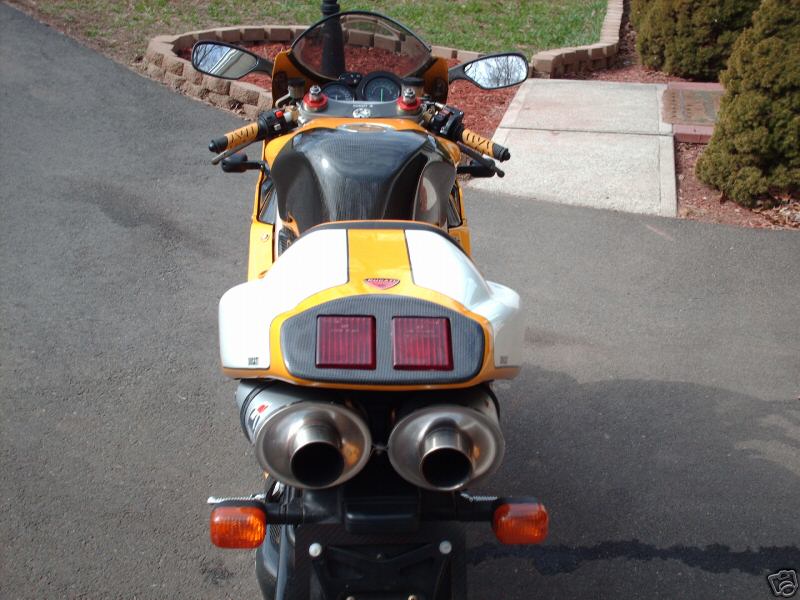
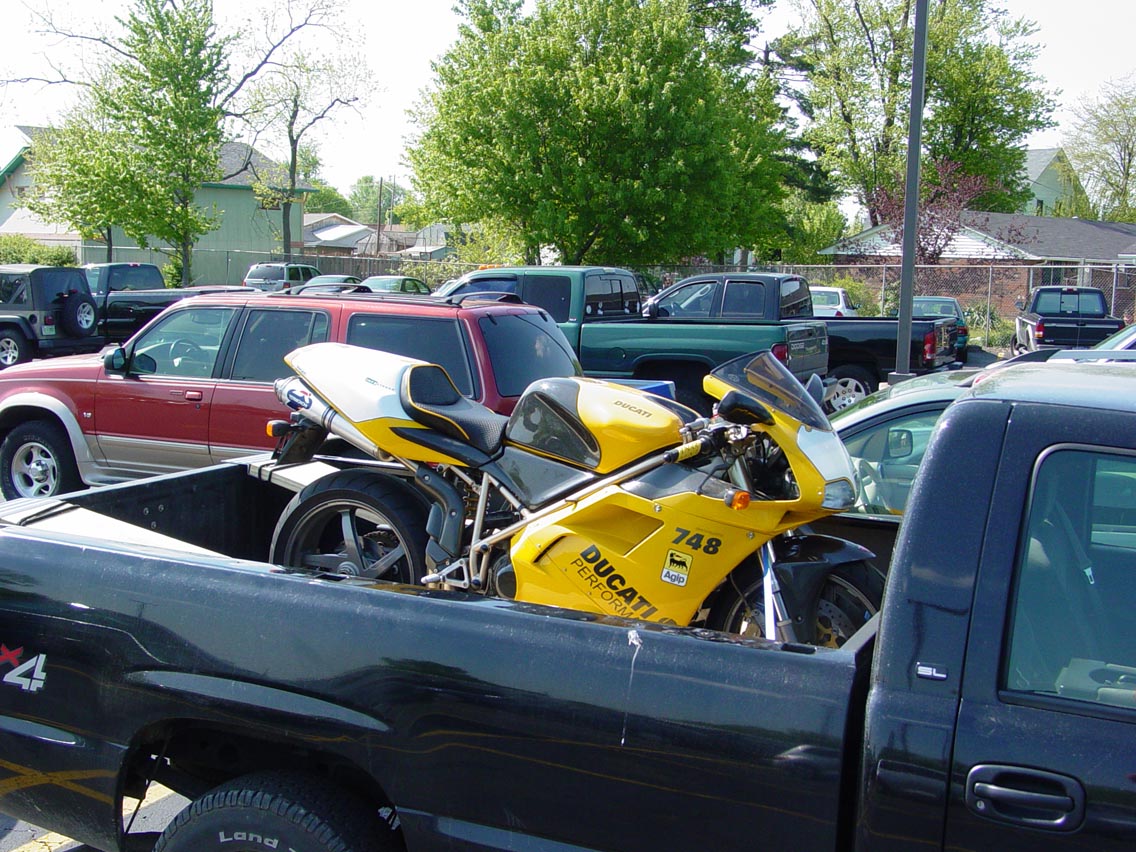
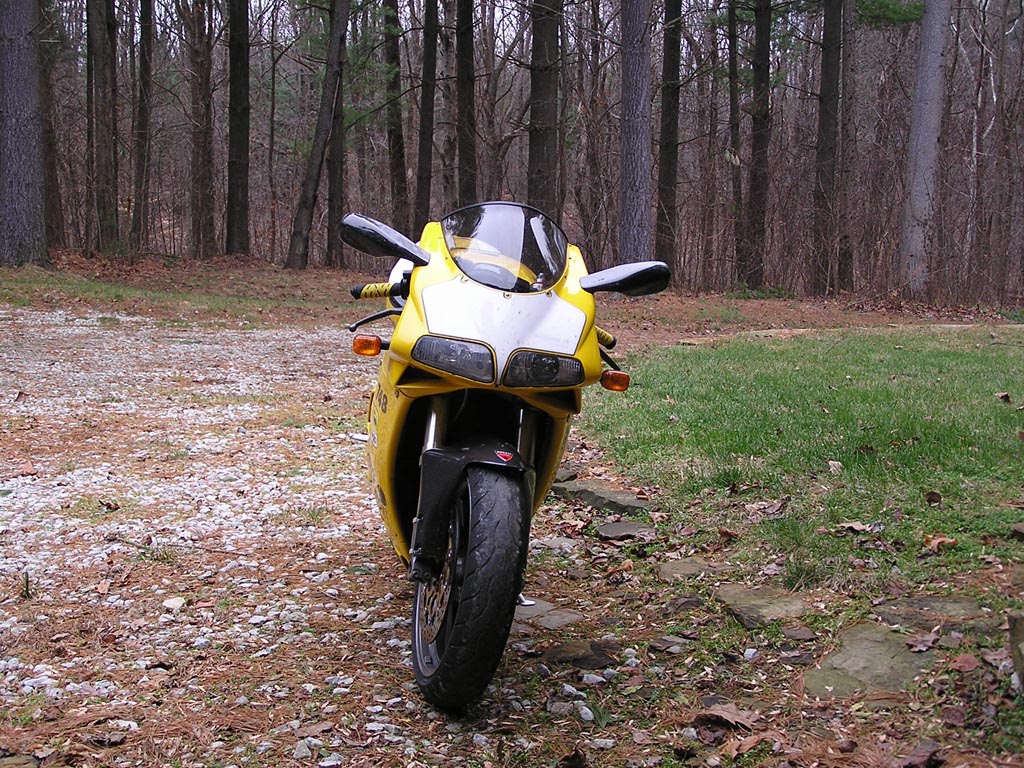
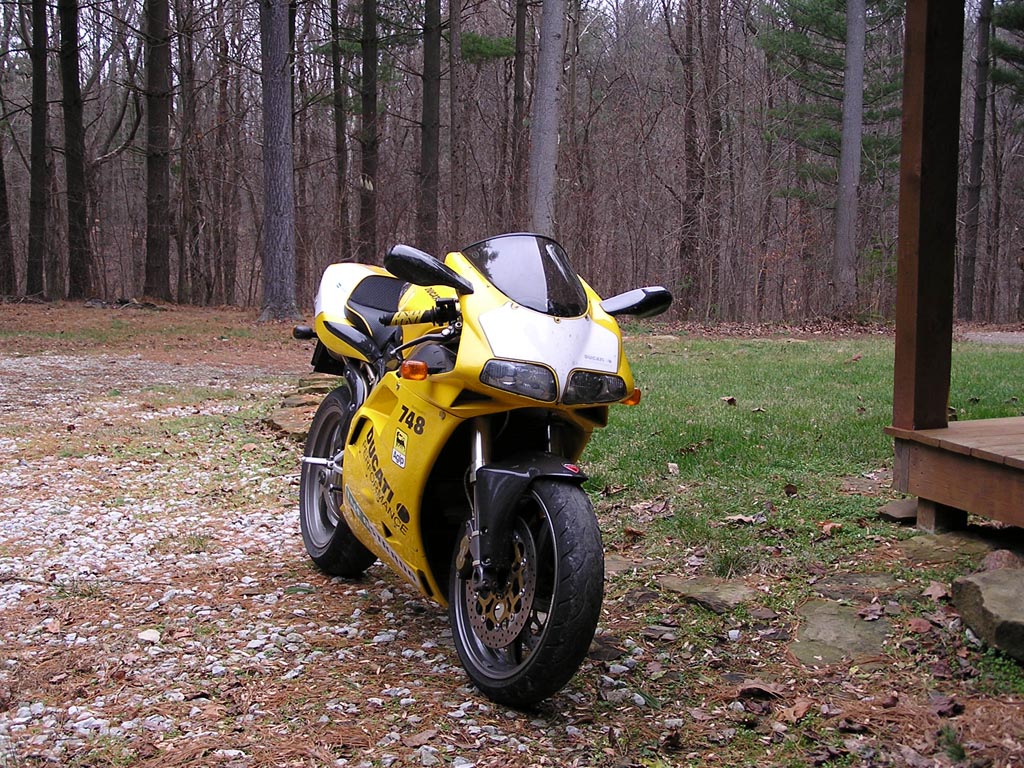
I bought a 1998 Ducati 748 superbike in April of 2006. This is my first motorcycle ever. In fact I had never ridden a motorcycle before I bought the Ducati. Stupid, right? Yeah, I read lots of advice saying to buy something smaller, cheaper, slower, in worse shape (so you don't get upset when you inevitably drop it), etc. But if I bought something I didn't really want, I wouldn't get out and ride it as much. So why bother? I wanted a Ducati with a single sided swing arm, V-twin engine (or L-twin), under-tail pipes, and all the other glories associated with a 748/996/998 series Ducati superbike. So I researched and tracked selling prices on ebay and eventually found this yellow 748. It was selling for lower than most other bikes in its condition and with its mileage were, and it just happened to be in a town that one of my friends lived in. I called the seller to ask some questions, and in the time it took him to call me back, someone else used the 'buy it now' option on ebay to snag the bike. I still asked the seller some questions and said I'd still be interested if his buyer fell through (as seems to be common on ebay with motorcycles). It turned out the buyer did back out - his wife told him she'd divorce him if he bought the bike. So I got a chance at it. Since it was no longer on ebay for sale, I convinced the seller to ride the bike down the road to where my friend worked and let him see it. Not that my friend knew anything about bikes, but at least he could verify it existed and ran. I got the green light from him (I believe his words were, "It's $&#!ing bad-@$$!"), and arranged for shipping. The first three pictures below are from the ebay auction. The next picture is me sitting on the bike as it was unloaded off the shipping truck and the last is it sitting in the back of my truck at work ready for the trip home. Some motorcycle enthusiasts at work were all too willing to help me load it up.


My 748 came with some extra goodies - actually the aftermarket parts' cost is about what I paid for the bike. It has a carbon fiber front fender, chin piece, air intakes, air box, headlight bucket, mirrors, instrument surround, exhaust pipe shield, key guard, tank guard, clutch cover, heel guards, chain guard, swingarm cover, license plate frame, and monoposto tail. Other add-ons are Ferracci bar risers and light smoked windshield, snow flake front brake rotors, HH sintered brake pads, Termignoni titanium exhaust, an Ultimap U211 chip, a Sargent seat, a 40 tooth STM rear sprocket, a gold anodized front sprocket cover, a Barnett billet clutch basket, a Barnett clutch disc, Casoli frame plugs, a K&N crankcase breather filter, and Marchesini 5 spoke wheels.

After I bought the bike, I started having some problems. It would randomly lose power when I accelerated, and the engine braking would throw me forward on the bars. Sometimes it would die, but it would always restart. I eventually diagnosed that as dirty injectors - well, at least some injector cleaner cleared up that problem. I also had some issues where the bike wouldn't start unless I opened the fuel tank, so for a while I had to carry a spare key with me to do that. I played with the breather nipple under the fuel cap and that seemed to go away. I also had problems with the fuel pump not turning on - I suppose that could have been related to the losing power problem, but it usually just wouldn't start. I wouldn't hear the pump run when I turned the ignition on. I traced that to the an intermittent fuel pump relay (the big one under the seat on the left). I replaced both relays with equivalent parts from Napa for about 1/3 the cost of the OEM Bosch, and no waiting. That's working fine now.
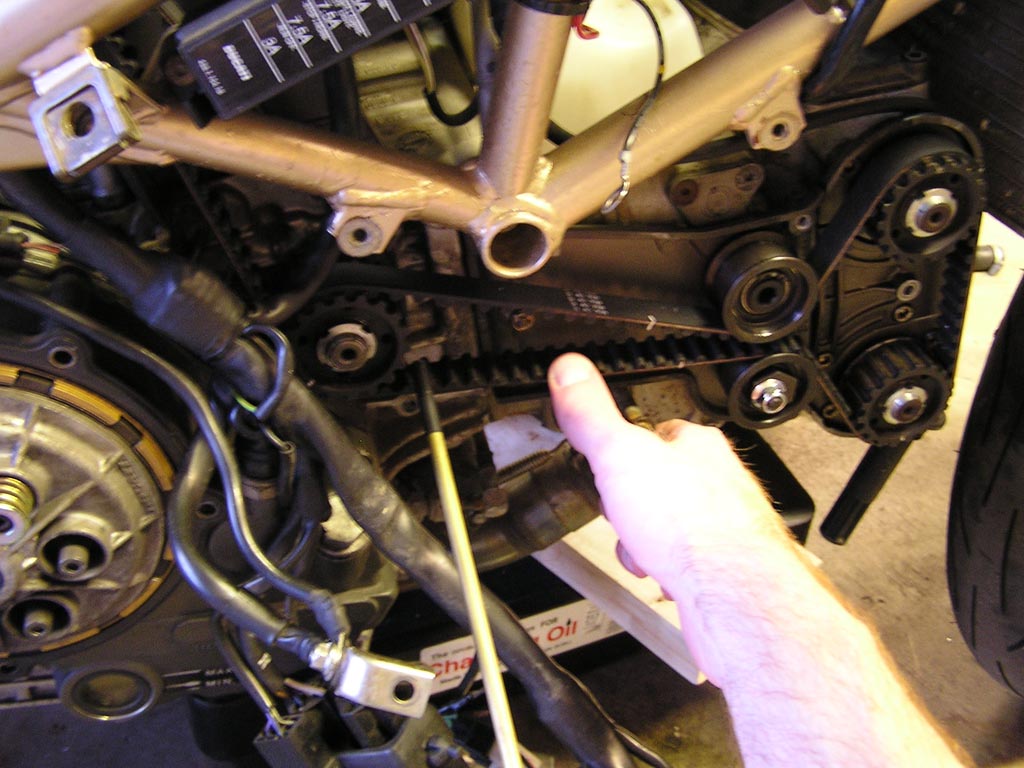
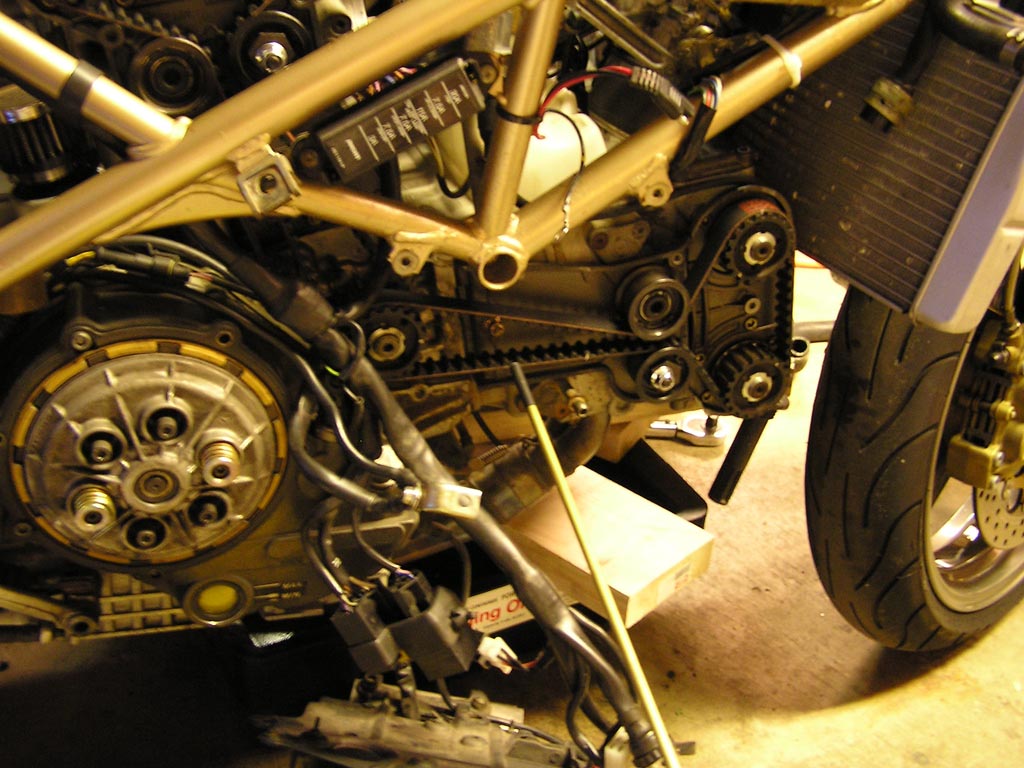
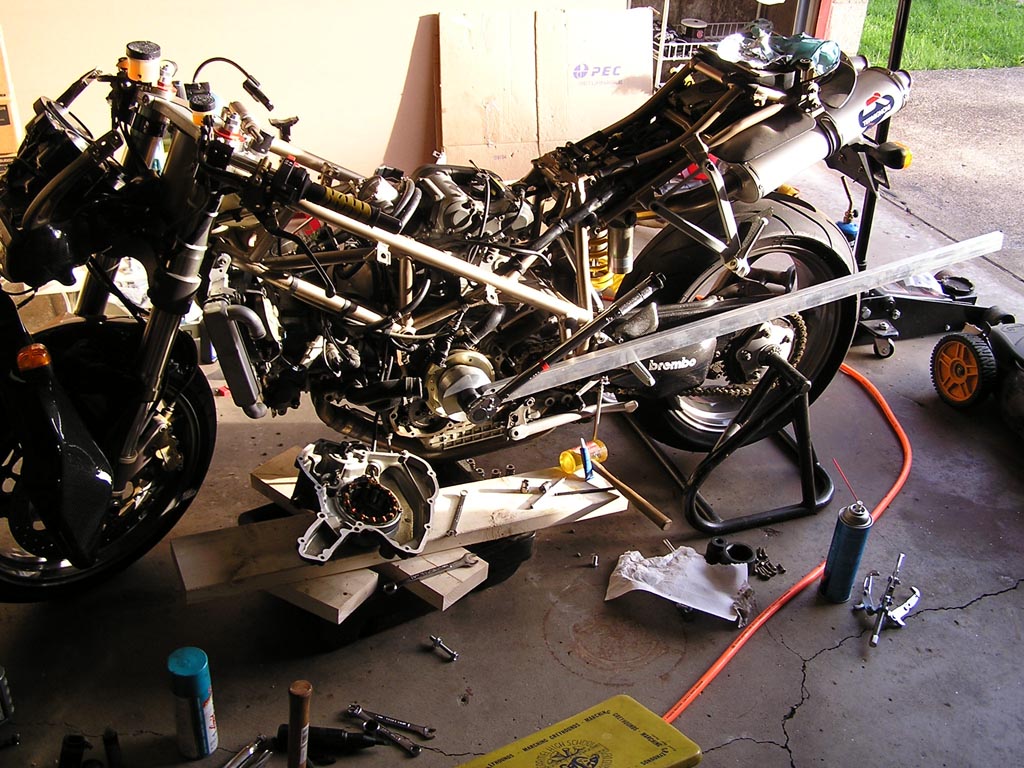
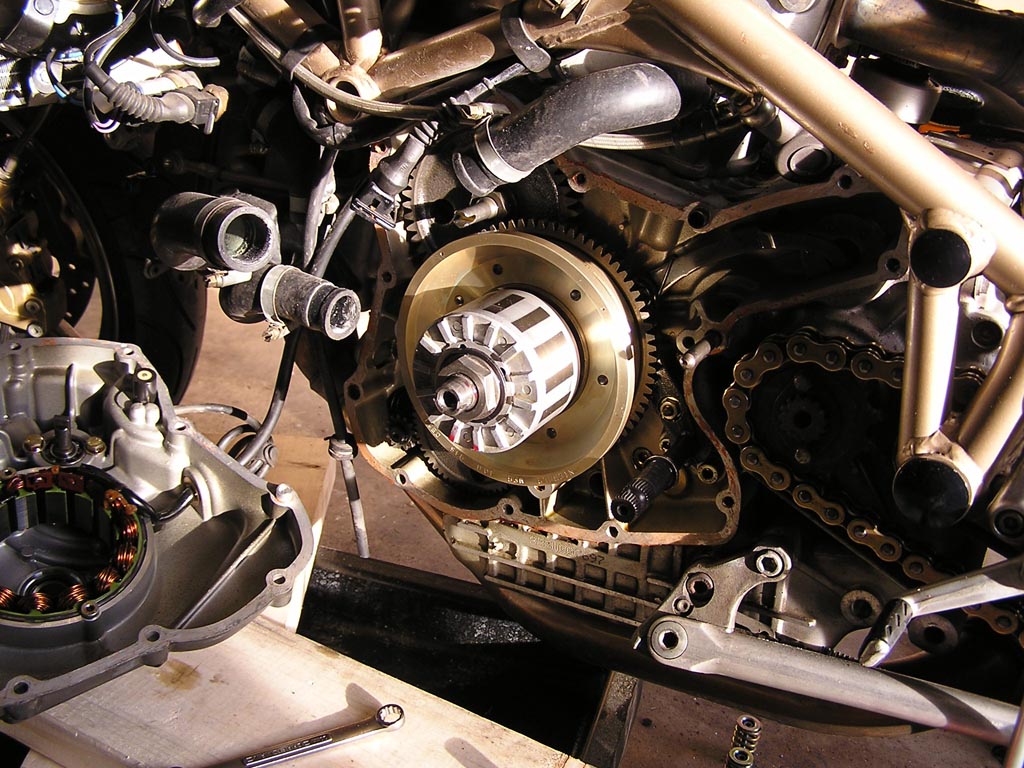
I also performed some modifications. When I did the 18000 mile service in the spring of 2007, I added Cycle Cat bar risers. I can't find a position where I can put them all the way up, but they do seem to help prevent my wrists from getting as sore as they did before with the Ferracci risers. It's hard to compare directly though since I switched at the beginning of the season after not riding for about 6 months. As part of my servicing at this same time, I replaced the front fork fluid, the timing belts, checked the valve clearances, had all the opening rockers replated by Megacycle, checked the clutch plate thicknesses and clutch spring lengths, changed the oil, radiator fluid, clutch fluid, brake fluid front and rear, and checked the alternator nut. Here's a pic of the bike mostly dismantled:

And then I put it all back together, and it worked the first time! I was amazed. This was the first time I've ever done anything this involved on a vehicle of any type. Later in the season, I started noticing a little jerkiness while cruising at constant throttle around 40-60mph. I finally figured out it was the throttle body synchronization. I resynced them using the FIM method which differs slightly from the Haynes recommendation or the shop manual, I think. It definitely improved things in the 4000 to 5000 RPM range which is where I cruise, but I think I made the idle balance slightly worse. In any case, it's running pretty well for the moment.
I'm currently working on repairing and refinishing one of the carbon fiber intake runners. After that I have a Sigma bike computer I want to mount, both for a (hopefully) more accurate speedometer and for the clock. In the future I plan on making a new carbon fiber tank protector, and maybe a new tail eventually.
In April and May of 2009, I was doing my 2 year maintenance on the 748. I checked my valve clearances and found that all the exhaust closers had tightened up slightly - they needed smaller shims to increase the clearance. I don't think this should be the normal mode of wear, so at the suggestion of some people on the ducati.ms forum, I made myself a leakdown tester. Not shown, there's a sparkplug grafted onto the end of the flexible hose. I did get some leakage from the sparkplug due to not being able to torque it into the head since the hose was attached, but not too much. See below:
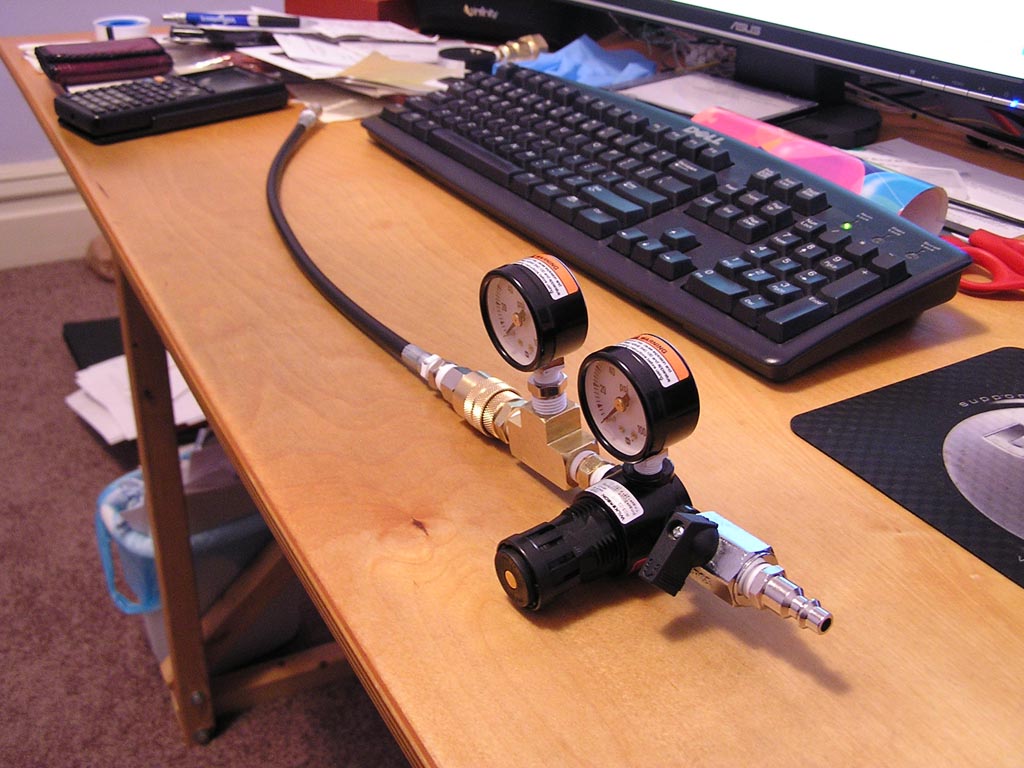
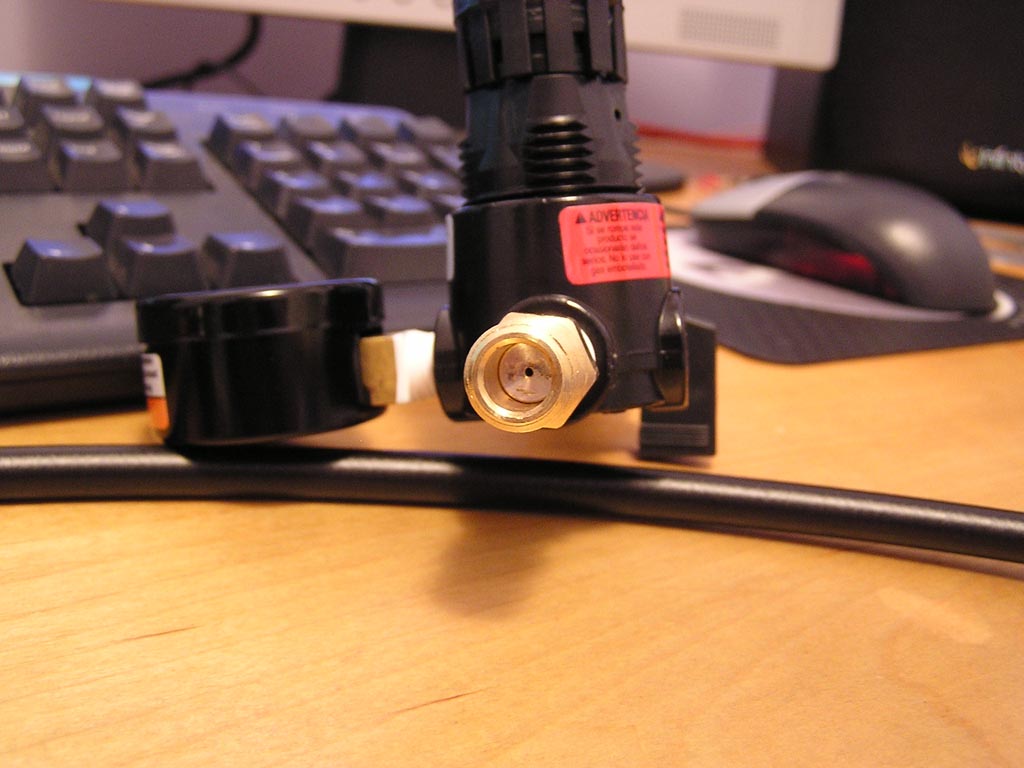
There's a plug in the connection between the pressure regulator and the second pressure gage with a 0.040" diameter hole in it which is the FAA standard for engines under 16L displacement (from what I understand from doing some reading).
I had about 7% leakage from both cylinders. However neither cylinder seemed to be leaking out the exhaust. The horizontal was leaking air into the crankcase and a bit out of the intake valves. Also, at locations other than TDC, the vertical would leak air into the crankcase as well.
I also replaced the timing belts. I tensioned them using the acoustic method. To do this, you set the resonance to 110Hz +/- 5Hz. Here's a picture of my setup. The long brass tube has a microphone in the end of it.
I also tried putting the mic in the center of the run - this should pick up the primary resonance a bit better I think.
However, what I found is that the second harmonic of the resonance is what needs to be set at 110Hz. Setting the fundamental to 110Hz puts the belts under way too much tension (using the 5mm allen wrench method and 45 degree belt twist methods as checks). To show this, here's a screen shot from the FFT program I was using (JdFT - a free FFT analyzer program):
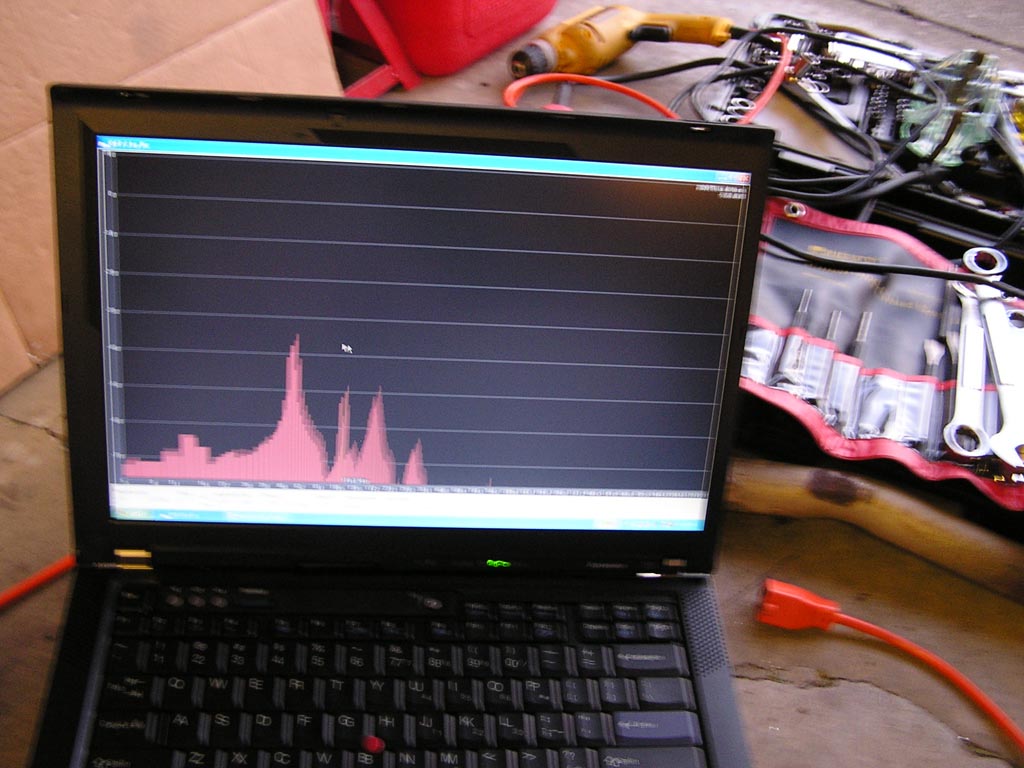
The large peak at the left is the fundamental resonance around 55Hz. The next peak that the mouse cursor is above is the second harmonic at 110Hz. This is the peak that I watched while adjusting the tension.
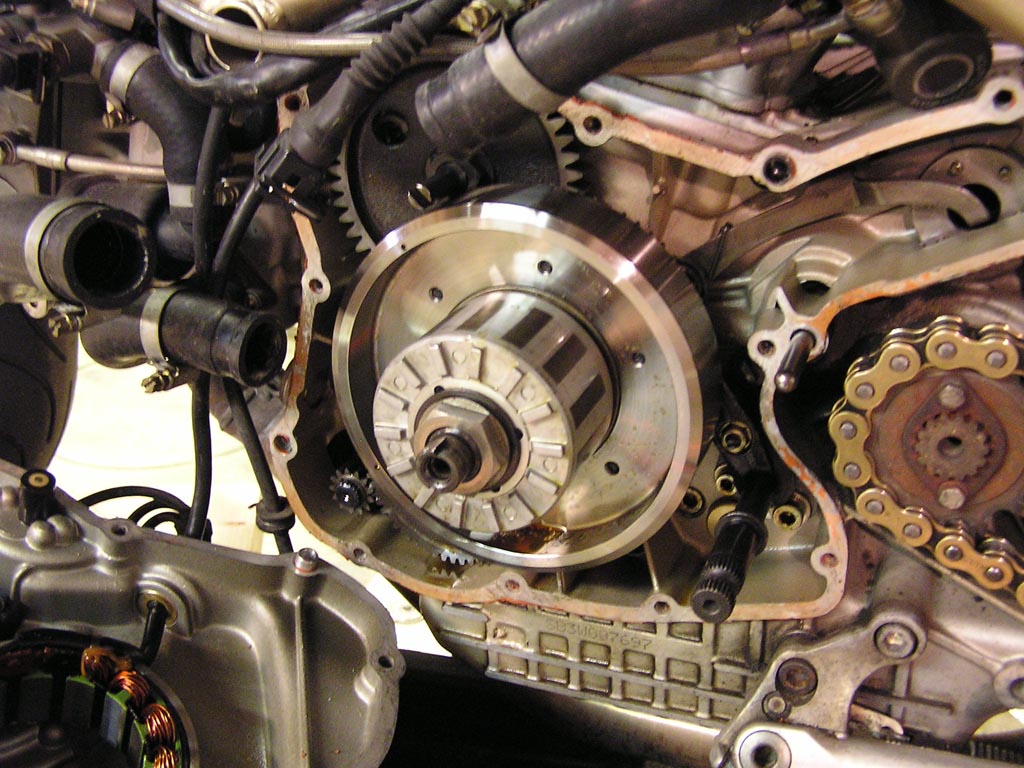
I also had to check the tension on the large nut holding the flywheel to the crankshaft on the left side of the engine. This is a pain to do, as there's no easy way to hold the crankshaft still while putting the required 120-130 ft-lbs of torque on the nut. The previous time I did this, I jammed a penny between the gears of the starting mechanism, but this doesn't seem like the best idea in the world. So this time I took advantage of my newly made CNC router and made myself an alternator holding tool out of aluminum. I also decided to replace the stock steel flywheel with a lightweight Nichols aluminum one to try to get a faster revving engine. Here's what I had to start with:
And here's the alternator holding tool I made:
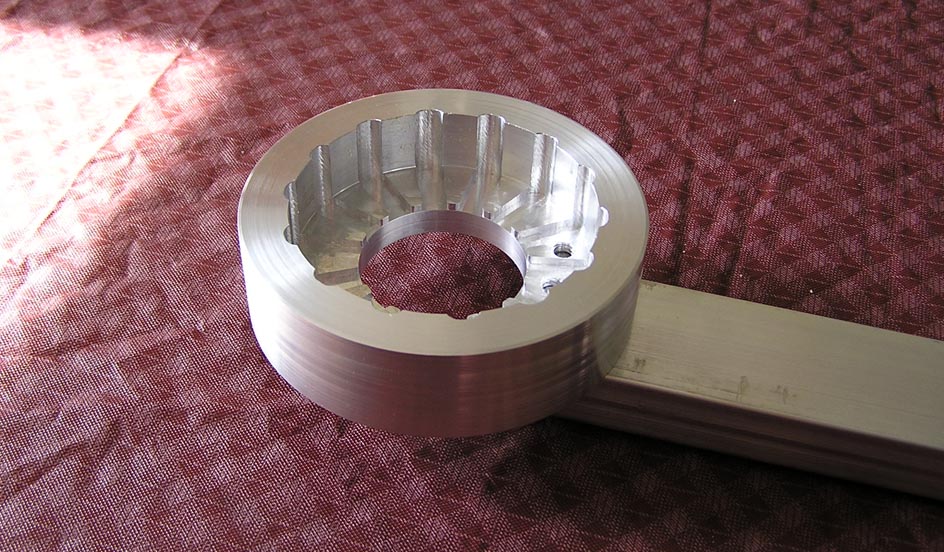
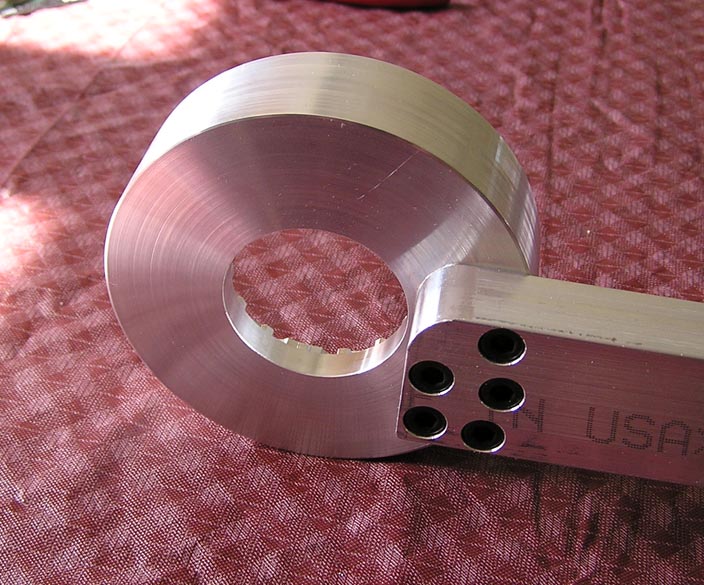
This will fit over the alternator and engage on the tabs on the front of it. It's not really needed to get the nut off - an impact wrench does that nicely.
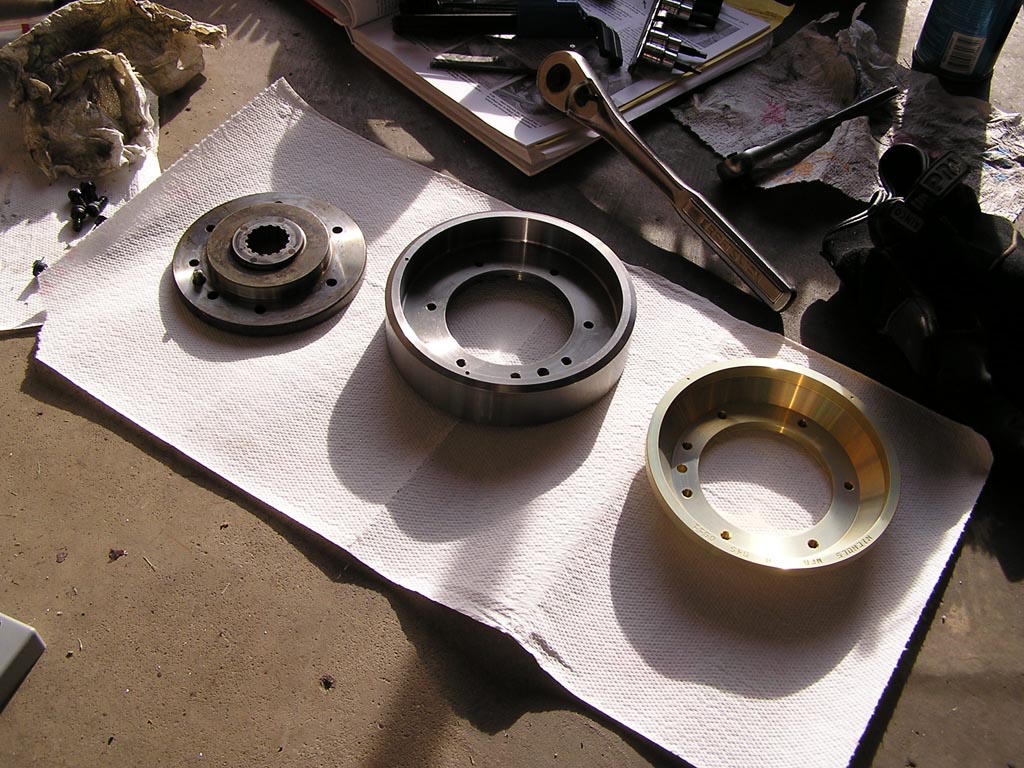
Here is the flywheel center (on the left), the stock flywheel, and the new Nichols flywheel:
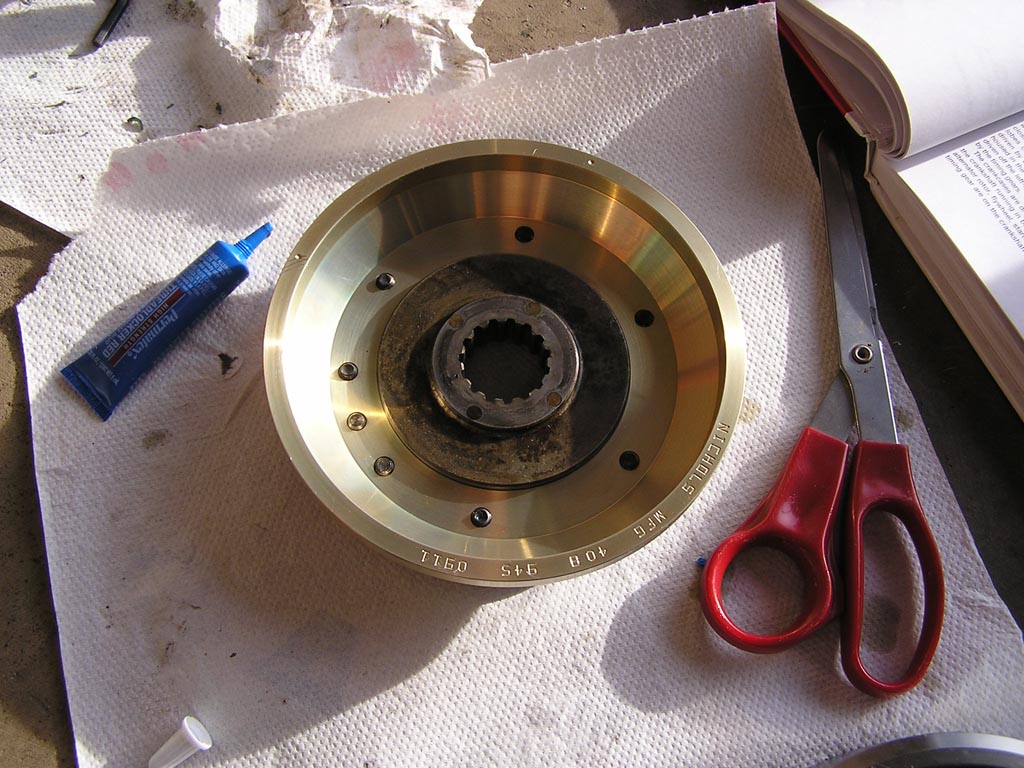
The flywheel installed on the center:
Everything loaded on the crankshaft, ready for the nut - the alternator holder tool engaged on the alternator:
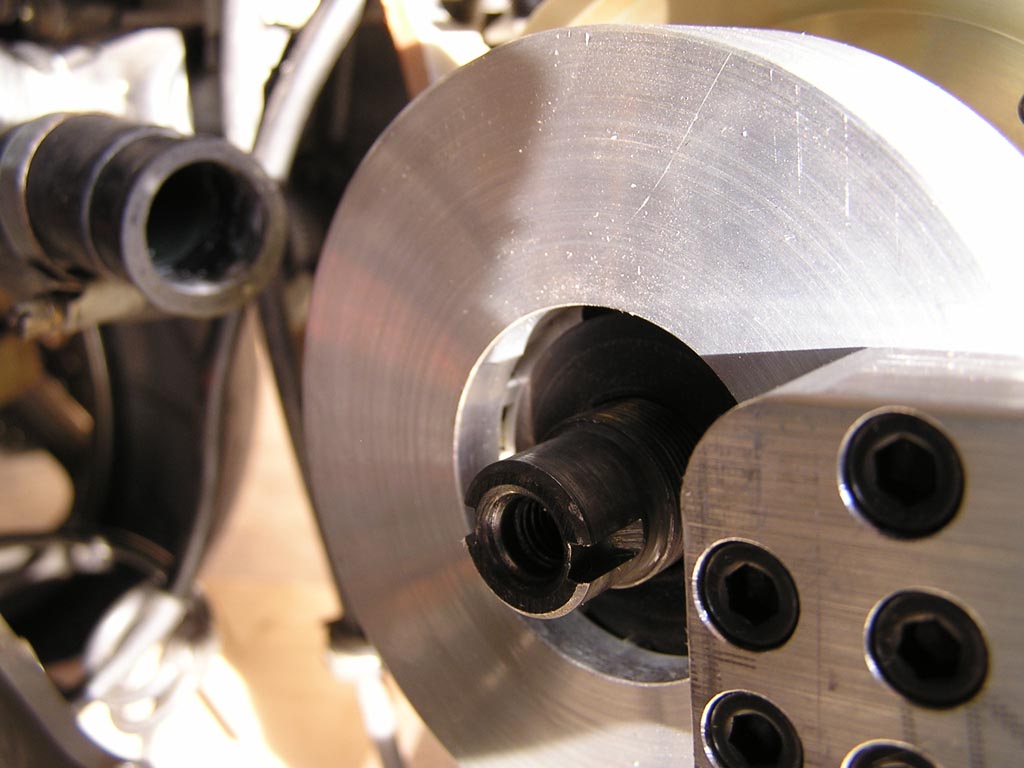
A shot of everything. I just had to press down on the torque wrench, and I was good to go. The holding tool made this really easy.
The finished product:
After I buttoned up the left side of the engine, I added some Samco hoses as some of mine were leaking slightly:

I also put a Braille B129 battery in my battery box in place of the original Yuasa. This is an AGM battery with good performance for its weight. It's 9.5 pounds, has a 12A/hr capacity, and has 323 cold cranking amps. Compare that to 11.5 pounds for the stock YB16AL-A2, 16A/hr, and 200CCA. The immediate downside to this battery is that it's wider than the stock battery and also smaller in height and length. I made up some brackets to fit it in the stock battery box - see below. I found that it needed to be mounted high and forward in the battery box in order to fit. Eventually I might make a new battery box that sits it a bit closer to the engine. As it is, the fairing presses against the battery slightly. Also, because the battery box flexes slightly, I wired the clamp I made to hold the battery up against it. This last bit made it a really snug fit.
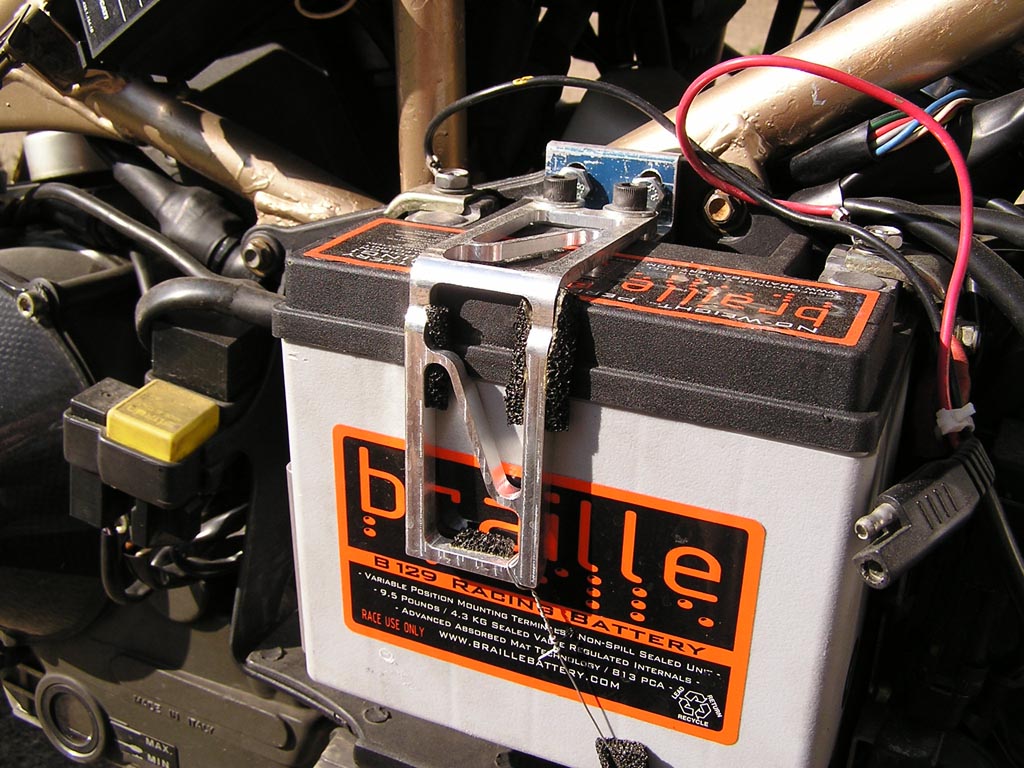
Another issue is that the terminals are reversed from the stock battery. This can be worked around by putting the terminals towards the engine and slightly rerouting the battery wires. I also had to remove a wire mesh air exit cover that was right above the battery. This potentially could have shorted the battery's positive terminal to the frame. On the plus side this gives me a handy place for a battery tender hookup.
Click here to return to my home page.