Casting throat plates for horns
I've been working on making some midrange horns, and I want to make aluminum mounting plates for the compression drivers. One plate will be glued to the horn, and the other plate will bolt to the driver. Then that plate can be bolted to the plate on the horn to mount the driver to the horn. I didn't have enough aluminum plate sitting around to cut the throat plates out of, so I decided to cast them using scrap I'd collected. I think it's been about 4 years since I did any casting, so it took some work to get my setup running again.
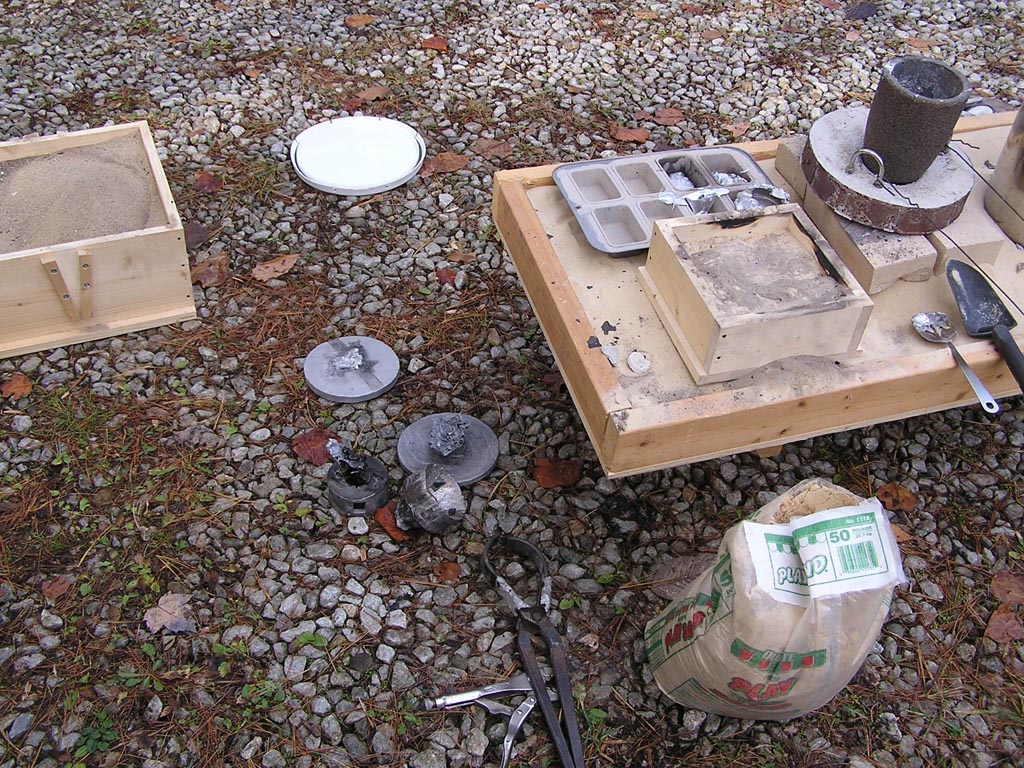
In this first picture, you can see some of the throat plates I made - the discs
on the ground. They're 6.5" in diameter and about 0.5" thick. I made five of these plus two throat adaptors for Parts Express horns (the other things on the ground next
to the discs). Everything turned out pretty well except one of the throat
adaptors - I ran out of aluminum while pouring so it had some shrinkages. It might still be usable.
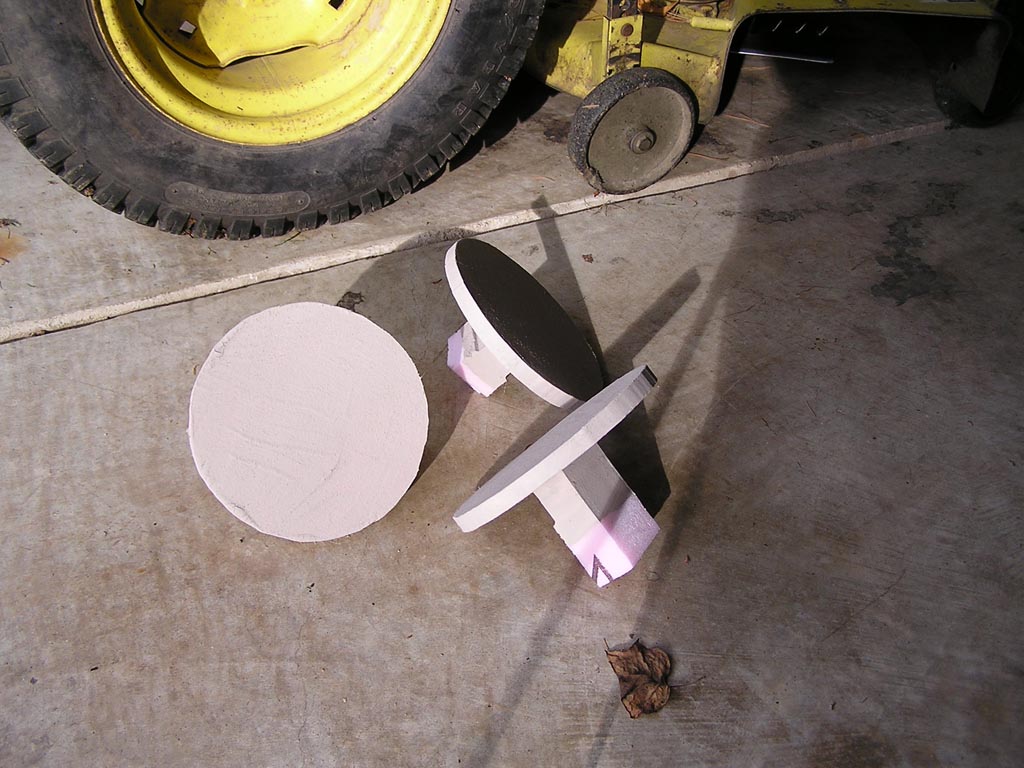
Foam patterns for the throat plates:
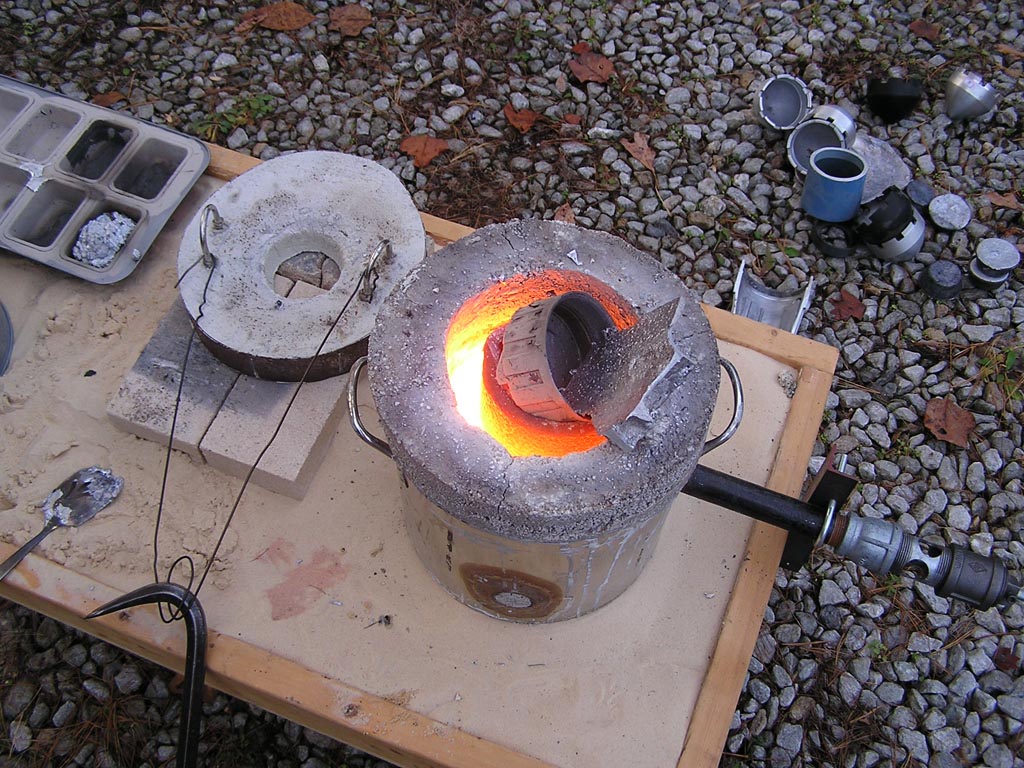
The heat is cranked up. Scrap is being fed into the crucible. This is a really inefficient way to melt stuff - it goes much faster if I can actually fit it in the crucible.
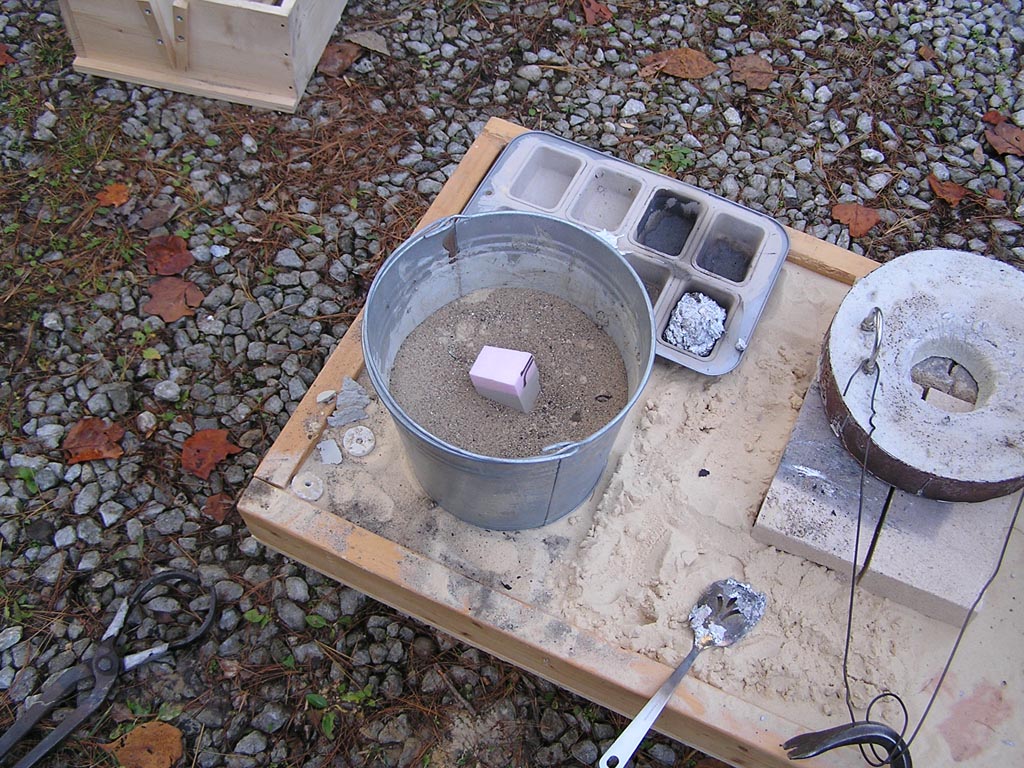
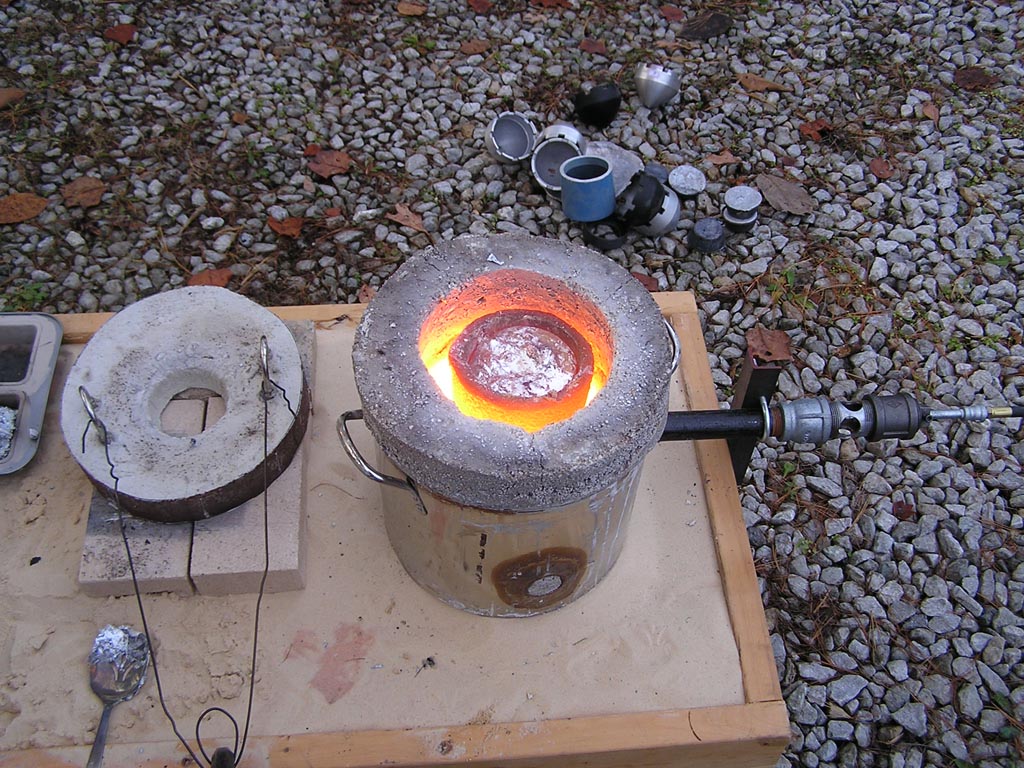
A foam pattern buried in sand, ready to be cast. I'll pour metal on the exposed
foam, and the metal will take the place of the foam almost instantly.
More melting:
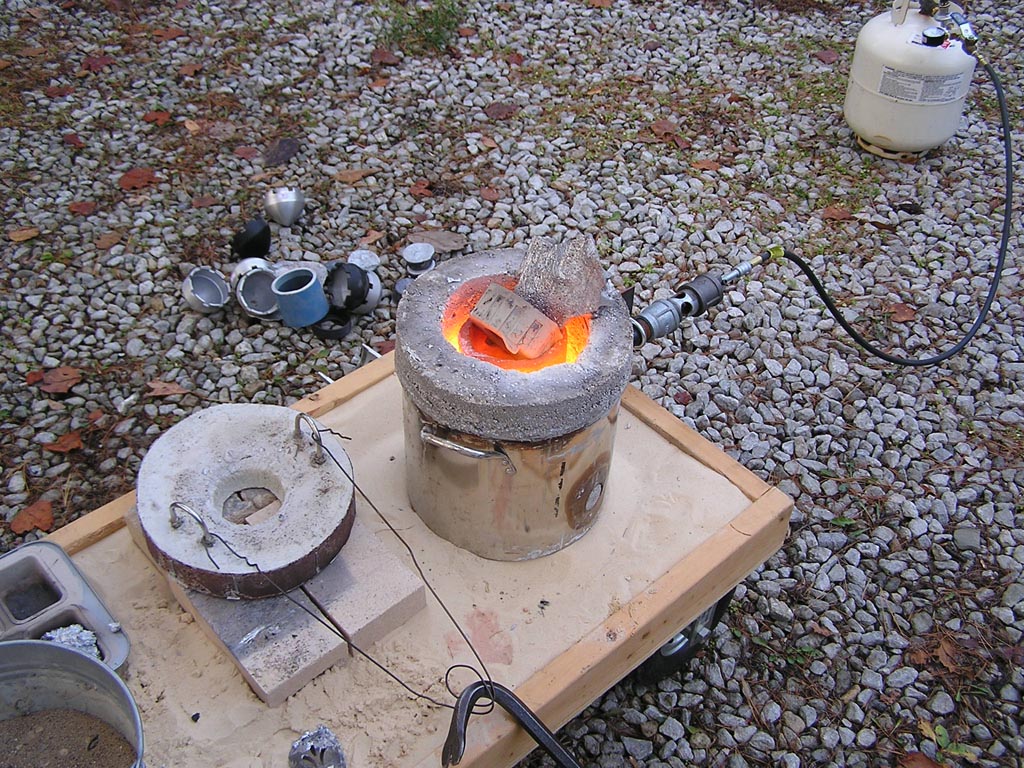
Crucible full of molten aluminum:
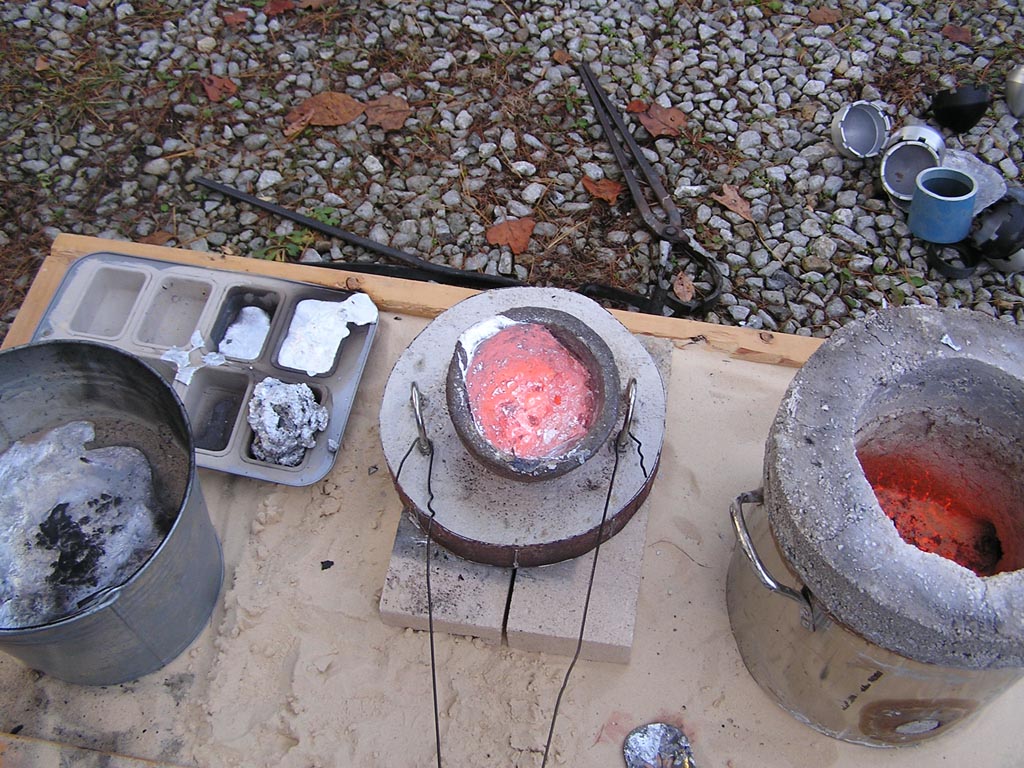
The aftermath - the cast part is still in the sand on the left, with the overflow
on top of the sand. An ingot of left over aluminum is cast in the baking pan. There's also a pile of dross in the baking pan. The empty crucible is in the middle still glowing slightly. The furnace on the right is still glowing a bit as well.
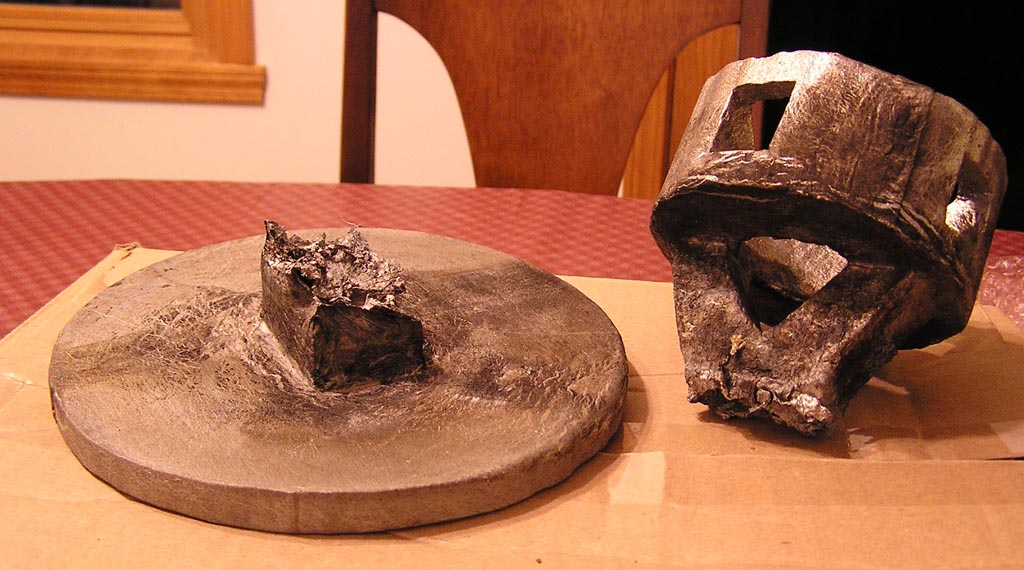
The finished parts (well, they still need machining...). The stripe across
the disc is where I had masking tape covering some dings in the foam - it came
out really well.
On to machining! First I faced one side of the plates and bored a hole in the middle. Then I drilled two holes for bolts. Then I made a sort of mandrel to hold the plates in the lathe so I could turn the edges. The mandrel has a boss on it that the bored hole locates on and bolts to hold the plate to it. After I finished making this, I used it to face the opposite sides of all the plates and turn the edges.

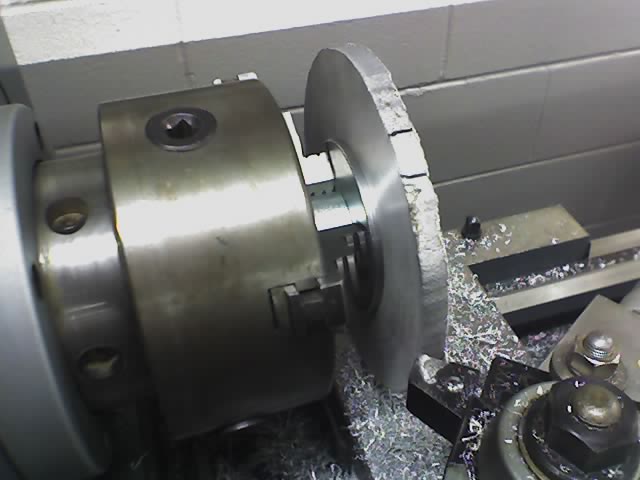
Next, although not shown, I milled flats on the edges of the plates to make them easier to hold and locate in the mill (although I could have done this a different way to keep them round). Then I drilled and tapped all the bolt holes and clearance holes. Last, I bolted the pairs of plates together, put them in the lathe, and turned the taper in the middle. This ensured a perfect match between the plates. Here are some finished pictures:
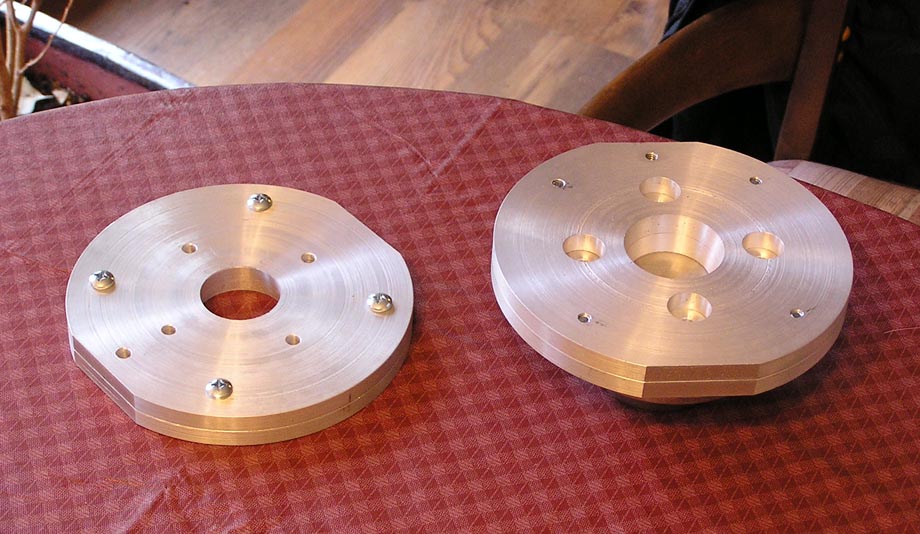
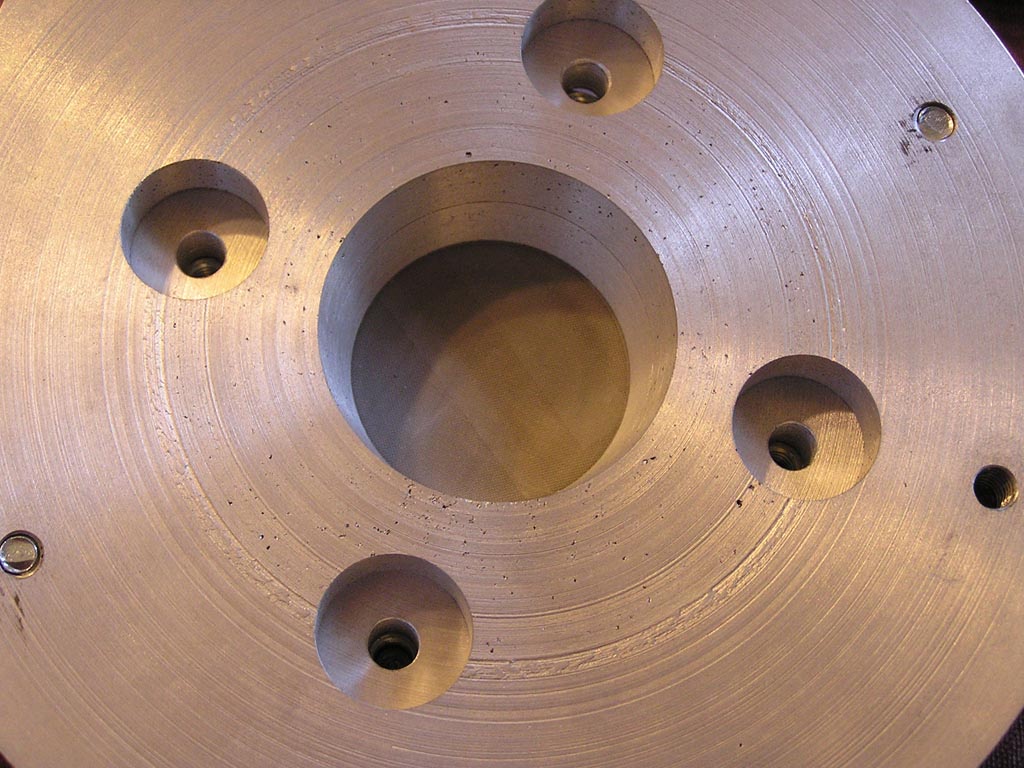
You can see in the close up that there is porosity in the aluminum. My casting technique (and my alloy) is far from perfect. The bad alloy machined very badly which led to some rough spots, but overall they look pretty nice and they are very functional. You can see the edge of the gasket on the driver in one pick, but that's because the plate is just set on it and is slightly misaligned. I was within 0.002" of the throat diameter on one part and off by slightly more on the other, but still too small to see.
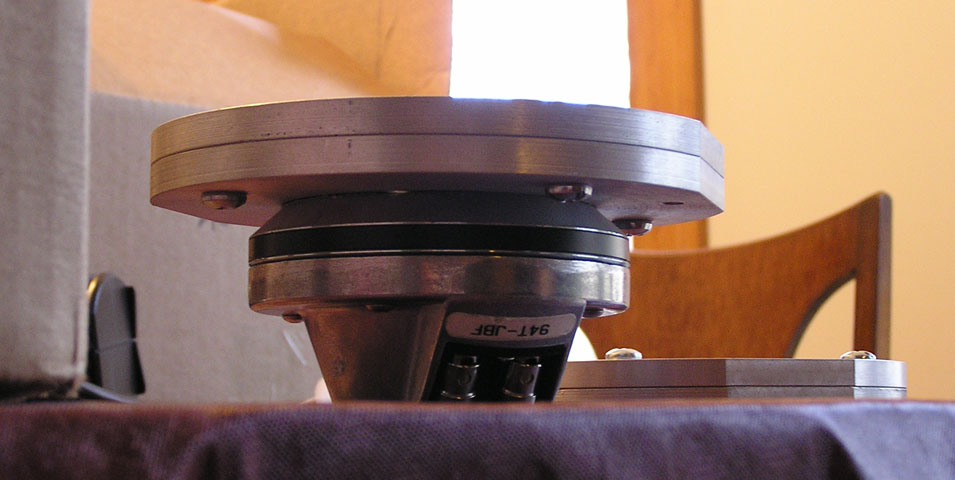
In use, the plates with larger holes will get glued to the horns. Then the driver will bolt to the other plate and that plate will get bolted onto the plate on the horn.
Copyright 1999-2008, John H Sheerin
Click here to return to my home page.